


Springerle cookies have been used with carved molds and stamps for centuries. This dough is firmer and more structured than standard sugar cookie dough, which allows intricate designs to hold beautifully. These cookies are a labor of love, but the results are worth it. I would suggest reading this entire blog post before starting so you are familiar with the steps ahead.
Ingredients
-
¼ tsp Hartshorn (also known as Bakers Ammonia) You can also use baking powder which is more common in modern-day kitchens.
- Note* if you use Hartshorn/bakers ammonia, your dough will taste terrible when raw. The bakers ammonia needs to bake off during the baking process. I love sneaking a taste while I bake, so this is one of the reasons I prefer baking powder.
- 1 TBSP of Heavy Cream
- 150 grams egg (about 3 eggs) For best results, weigh cracked eggs – If egg weight exceeds amount, remove yellow to get to the weight*
- 1 TBSP of unsalted, room temperature butter
- ¼ tsp salt
- 3 cups powdered sugar (360 gram)
-
4 cups cake flour (453 grams) Swans Down or Softasilk brand work well.
- Depending on humidity, you may not use all of the flour. I live in Colorado at mile high altitude and I use about 3 cups. You'll be adding the flour in gradually so you can keep an eye on the dryness of the dough.
- Reserve any extra flour for kneading or combine it with powdered sugar for rolling and mold dusting.
- Flavorings: 1 tsp *My personal favorite is LorAnn Lemon oil and adding zest from 1 1 lemon.
- Other flavoring options: 1 tsp Kirsch, 1 tsp vanilla extract, ½ tsp almond/orange/or other extract. *Taste and increase flavors as needed. Have fun experimenting with your personal favorite flavors.
Instructions
1. Activate the leavener
In a small bowl, dissolve the hartshorn (or baking powder) in the heavy cream. Let sit at least 20 minutes (up to 1 hour). Bubbling and foaming are normal.
2. Whip the eggs
Using a stand mixer with the whisk attachment, beat the eggs on high for 20–30 minutes, until very thick, foamy, and pale yellow.
3. Add the powdered sugar
Lower mixer speed and slowly add the powdered sugar. Once incorporated, add the cream-hartshorn mixture, butter, salt, and flavorings. Increase speed to high and beat another 20–30 minutes until glossy and aerated. Yes, this recipe is a LOT of beating using your mixer!
4. Add the flour
Switch to the paddle attachment. Slowly add the cake flour, allowing it to fully absorb before adding more. Mix until the dough pulls away from the sides of the bowl.
You’re aiming for a firm, slightly tacky dough, similar to playdough. If it feels too wet, add a bit more flour.
5. Rest the dough
Wrap tightly in plastic and refrigerate overnight or up to 2 days. This rest improves structure and makes stamping easier.
I normally allow dough to rest overnight. For example if I make my dough in the AM, I might press molds late afternoon/evening the next day.
Shaping & Stamping
6. Prepare your workspace
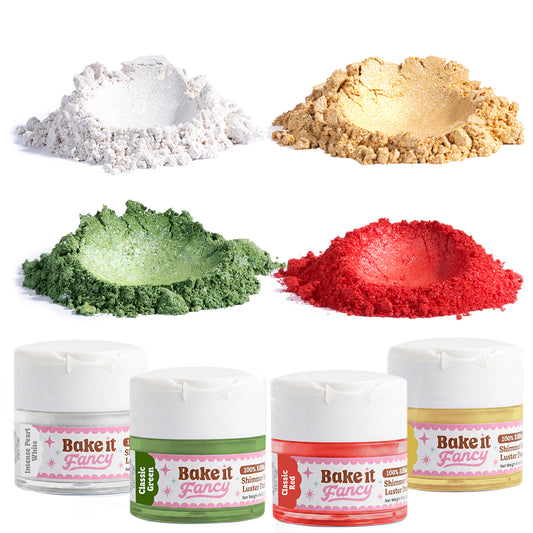
Mix equal parts powdered sugar and cake flour and use this to dust your surface, dough, and mold.
Work with small portions of dough at a time, keeping the rest wrapped and chilled.
7. Roll & stamp
If the dough feels slightly tacky, lightly sprinkle with the powdered sugar–cake flour mixture and knead just until smooth. Avoid over-drying. Roll dough to about ⅜ inch thick.
Dust and gently rub the dough with a thin layer of flour to keep the cookie stamp from sticking. Then also brush flour on to your stamp and be sure to get into all the nooks and crannies. If there is too much flour, you can gently tap out the excess. But then be sure to do another round of light dusting to really make sure all the crevices are coated well.
Press the mold firmly but evenly. Avoid pressing too hard.
Lift the mold gently. A clean release with sharp detail is the goal.
Cut out shapes and transfer cookies to an aluminum foil–lined tray using a thin spatula. Re-dust the mold before each impression.
Keep the dough cool. The warmth of your hands is enough to make it pliable and helps prevent over-pressing.
Drying (this is key)
Let cookies rest and dry out uncovered for 24 hours.
They’re ready to bake when:
-
The tops are completely dry
-
The bottom has a small moist center and a thin, dry ring forms around the base
-
This moisture balance allows steam to escape during baking, creating the classic “foot” without damaging the design.
Just before baking, remove the cookie from the aluminum it was drying on, and place the bottom of each cookie on a damp paper towel for about 30 seconds to wet the bottom then transfer to a parchment lined baking sheet or silicone-lined baking sheet.

Baking
-
Bake at 290°F
-
Use parchment or a silicone mat
-
Bake similar-sized cookies together. Do not overcrowd the cookie sheet.
Start by baking one test cookie to dial in your timing. This small step saves a lot of heartache because oven temperatures and cookie sizes vary, and finding the sweet spot makes all the difference.
For smaller cookies, it will take about 15-18 minutes. For larger cookies, 18-22 minutes.
You’re looking for:
-
White tops and edges
-
Light beige bottoms
-
Fine cracking underneath the design and a visible “foot” are a good sign. The cracks allow air to escape while keeping the design on top beautifully intact.

Why the foot happens:
It happens because springerle cookies are dried before baking. The top dries and sets first, while the inside still has moisture. When the cookie goes into the oven, steam escapes from underneath, gently lifting the cookie and creating that characteristic ledge.
Why it’s a good thing:
-
It’s a sign the cookie was dried properly
-
It helps preserve the crisp, detailed design on top
-
It’s considered a hallmark of a well-made, traditional springerle
In short: the foot isn’t a flaw—it’s proof you did it right.
How to check if your cookies are done:
The best way to check if the cookies are done is by gently moving the top of one of the cookies. It should remain firm and not move when cooked through. If you feel a heavy resistance when lifting the edge of the cookie, allow a little longer cooking time.
Larger cookies may develop air bubbles in flatter areas during baking. If this happens, gently press them down and return the cookies to the oven to finish baking. You can also press out any remaining bubbles right after removing them from the oven.
Allow cookies to cool briefly on the parchment paper/silicone mat, then transfer to a cooling rack.
When stored airtight, the cookies remain soft inside for about a week. For longer keeping, freeze for up to three months.
My favorite way to enjoy a springerle cookie is enjoyed alongside a cup of coffee. It’s perfect for dunking.